Q: “How to trim MP3 on Windows Media Player. I just want to cut part of it and keep the same audio quality, is this possible?” – From Citi-Data.com
Developed by Microsoft, Windows Media Player is a media library application and media player that is used to play video, audio and view images on Windows computers. Using Windows Media Player to trim MP3 files is possible as long as you install the given trimmer plugin called SolveigMM WMP. To know more instructions about how to trim an MP3 in Windows Media Player, you can read this article, where you can find many other more easy-to-use MP3 trimmers as well.
- Part 1. Trim an MP3 File in Windows Media Player
- Part 2. Trim an MP3 File in Windows Media Player Alternative
- Bonus Tip: Trim an MP3 File Freely in Online MP3 Trimmer
Part 1. How to Trim an MP3 File in Windows Media Player
Windows Media Player, as said, is not provided with direct editing features. If you would like to edit or trim an MP3 file in Windows Media Player, you need a tool named SolveigMM WMP Trimmer Plugin to turn it into a multimedia editor. Therefore, on before acting, please download and install the plugin tool on your computer and next do in the following manner.
Step 1: Add MP3 to Windows Media Player
After the installation of SolveigMM WMP Trimmer Plugin on your computer, open Windows Media Player and then click Alt > go to “Tools” > “Plug-ins” > “SolveigMM WMP Trimmer Plugin” to start it. Next, touch “Open Media File” at the bottom of the window to add your MP3 file.

Step 2: Cut and trim the MP3 file
Whereafter, touch the “Edit File” button and you get to see the expanded controls of the trimmer plugin. To trim MP3, you are able to use “Add marker” button to set up the start point and end point of the MP3 segment that you want to keep. Or, you simply move the orange slider to mark the trimmed section. And then tap on the “Trim” button.

Step 3: Export the trimmed MP3
When you are pleased with the trimmed MP3 segment, head to “File” > “Save as…” to output and save it to your local computer.
Part 2. How to Trim an MP3 File in Windows Media Player Alternative
As far as I am concerned, the whole process of cutting or splitting an MP3 file in Windows Media Player is somewhat complicated, especially for beginners. Accordingly, it is essential to share Joyoshare Media Cutter as the alternative to cut and trim MP3 files.
Running on both Windows and Mac operating systems, Joyoshare Media Cutter is a user-friendly and all-sided MP3 cutter and trimmer. With the service of it, not merely can you cut a large MP3 file into multiple tracks at 60X surprising speed in 100% original quality but also make ringtone for iPhone and Android, convert MP3 file to compatible devices, modify output parameters, apply sound effects, etc. Impressively, Joyoshare MP3 cutter is designed with the Key Frame buttons, which lets you trim MP3 frame by frame with millisecond precision.

Features of Joyoshare MP3 Trimmer:
Extract MP3 from any video in a few of clicks
Cut and trim MP3 on Windows and Mac with no loss
Built-in editor to Edit an MP3 file in a professional way
Work with lots of audio formats and device-support ones
Increase output quality by customizing format parameters
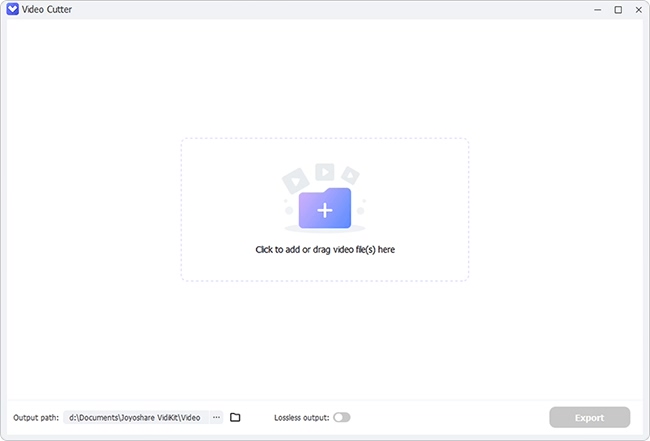
Step 1: Open Joyoshare Media Cutter to add MP3 file
Simply click the above download button to get the proper version of Joyoshare Media Cutter downloaded and installed. Double-click its icon to open it and go to the “Open” option to browse local files and select the target MP3 file to import. Or, drag and drop your MP3 to its interface.

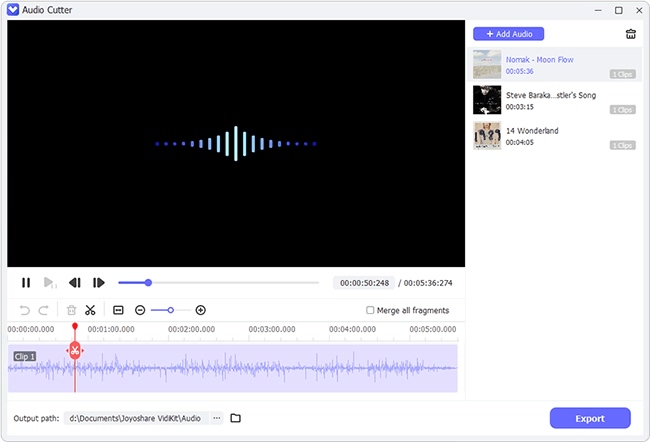
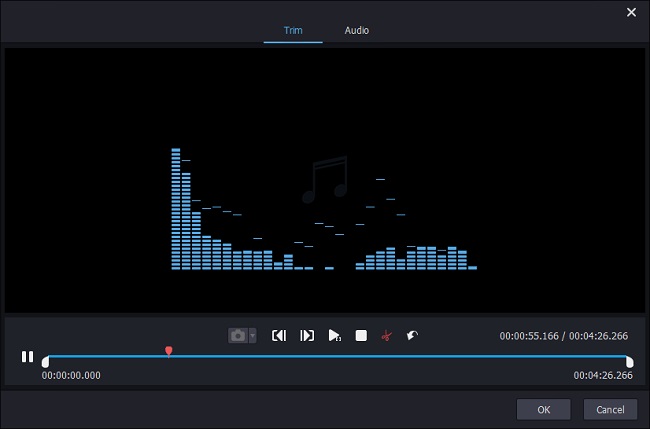
Step 2: Identify segments to be trimmed
When the MP3 file is uploaded, it will play automatically. Determine the segments of your MP3 to be remained while previewing. Then, pause it and move the timeline to wherever you specify. The area not being included within the yellow timeline will be trimmed off. That’s one of methods to trim an MP3 file. Besides, you also use the shortcut buttons – “Set Segment Start Time” and “Set Segment End Time” or manually enter specific start and end time to cut MP3 with perfect accuracy.
Note: To create multiple different tracks from your MP3 file, you need to touch “+” icon to generate more MP3 files. Next, extract the desired segment from each of MP3 files as described above. If you want to bring them back into one file, check “Merge Segment” before the output

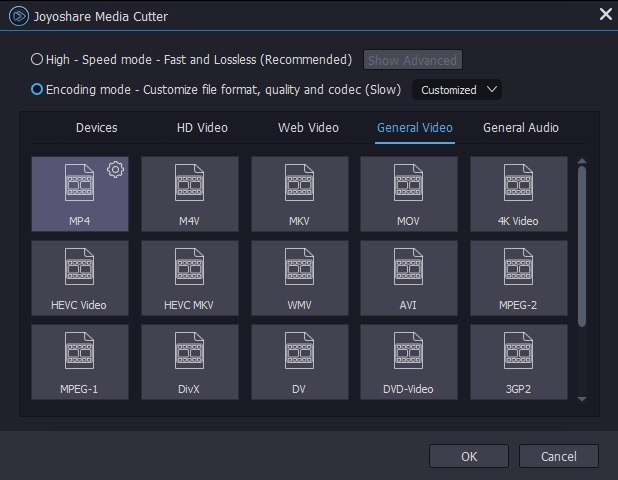
Step 3: Specify output format
Next, get into the format window by “Format” option. As this point, select an output format according to your needs. Generally, it is recommended that you specify the audio export format under the “High-speed mode” that is a lossless mode to cut and trim your MP3 with completely original quality. Though, it comes with no advanced editing features, such as adjust the volume, use sound effects, modify codec, sample rate, bit rate, channel, etc. If the additional editing is required, please enable the “Encoding mode”.

In the “Encoding mode”, the built-in editor will be enabled. You are allowed to enter the edit window by an “Edit” icon. In the new interface, sliding the time handles and clicking a scissor-shaped icon can also realize to trim MP3 file easily.

Step 4: Save trimmed MP3 file
By this time, all was ready. You should return to the start window and hit on “Start” button to export the trimmed MP3 file. When the process is concluded, tap on the “Open The Output Folder” ![]() icon to locate your saved MP3 file.
icon to locate your saved MP3 file.
Extra Tips: How to Trim an MP3 File for Free in MP3cut.net
By now, you are bound to have got how to trim an MP3 file in Windows Media Player and its alternative – Joyoshare Media Cutter. Just for more new possibilities and options for you all, this part details an online MP3 cutter – MP3cut.net to trim MP3 for free as a bonus tip.
Pros:
Support more than 300 different formats
Easily extract soundtrack from a video
Fastly and securely cut an MP3 file
Fade in and fade out audio effect
Cons:
The interface comes with ads
The processing speed is not guaranteed
The file needs to be downloaded after output
Step 1: Upload MP3 to MP3cut.net
Visit http://www.mp3cut.net on your browser. In its main interface, tap on “Choose file” to import the MP3 file from the system or directly drag your MP3 to it. The upload speed might be slow if your file is too large.

Step 2: Start to trim MP3
In the next interface, you could set about trimming the uploaded MP3 file. There are two methods that you can use alternately. One of them is to respectively move the left blue time controller to the start point and the right one to the end point. The other is manually setting the duration of the MP3 fragment to be kept by inputting the start time and end time. This online MP3 cutting tool supports the audio effects of fade in and fade out. If necessary, you can apply it to make the MP3 play more smoothly.

Step 3: Download the trimmed MP3
Once done, choose an output format and press on the “Cut” button. Wait until the progess bar comes to 100%. Then, click on “Save” to download the final MP3 file to your local folder.

For more information, you could visit the source page: https://www.joyoshare.com/video-cutting/how-to-trim-an-mp3-file-in-windows-media-player.html

 .
.