Q: “I am gonna play among us with my friends and I want to record it since it is fun. How do I record Discord audio?” – From Reddit
Discord is a perfect place for every gamer to chat with their friends over voice, video, and text. Starting a group on Discord will make free chatting more convenient and secure. In addition, you will be able to send GIFs and Images to your chat group members, which will definitely make the process exciting and funny. If you would like to record Discord audio to save any significant moment, you can refer to this article, which will provide you with the two most commonly used solutions.
Part 1. Joyoshare VidiKit
Part 2. Camtasia
Part 1. Record Discord Audio with Joyoshare VidiKit
Joyoshare VidiKit is one of the most popular and fantastic Discord audio recorders on both Windows and Mac computers. It will provide you with an intuitive user interface. Keeping up with leading recording technology, this powerful screen recording tool is able to create a high-quality and enjoyable video and audio recording experience. You will be capable of capturing audio from both the computer system and microphone clearly and smoothly.
Additionally, a variety of custom settings are available for all users to customize their Discord audio recording. For example, you will be offered options to change shortcut controls, preset your output format like MP3, FLAC, ALAC, M4A, etc., add a schedule recording tasks, highlight cursor and clicks, add a personal watermark, and a whole lot more. To conclude, with the help of Joyoshare VidiKit, you will be able to record any video and audio chat in no time flat.
Key features of Joyoshare VidiKit:
- Record video chats on Omegle, Tango, Skype, etc.
- Grab both internal and external sound in high quality
- Support a large number of audio formats
- Adjust audio codec, channel, bitrate, sample rate, etc.
- Record discord audios in real-time with no lag
- Customize recordings by trimming, editing the ID3 tags, etc.
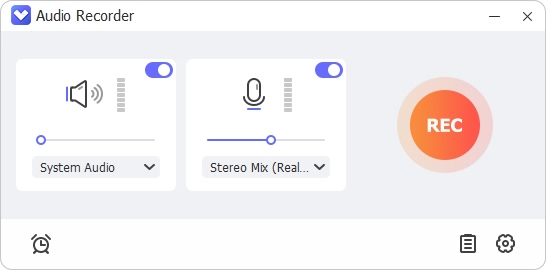
Step 1: Install Joyoshare VidiKit and Open Screen Recorder
After successful installation, run Joyoshare VidiKit on your Windows or Mac. Open the “Record” panel so that you can activate the screen recorder. In order to record Discord audio, you are supposed to press the speaker-like icon on the right side of the screen to use the “Record audio” mode. Remember to turn on “System Audio” and/or “Microphone” and change the volume according to your requirements.

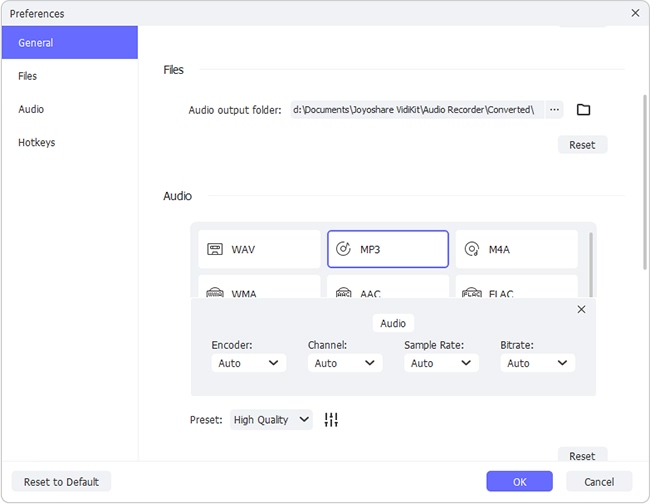
Step 2: Change Audio Recording Settings
More settings options related to audio recording can be accessed after clicking the gear icon near the “REC” button. You will be able to choose any audio format you like and adjust its codec, bitrate, sample rate, etc. You can also customize the shortcut keys. More surprisingly, under the “Record time options”, you can choose to start Discord audio recording manually and let the program end recording automatically, which will surely bring you a lot of conveniences.

Step 3: Begin to Record Audio from Discord
When you are ready, you can tap the “REC” button to start to record Discord calls after a three-second countdown. Using the three buttons on the minimized toolbar will allow you to skip any unwanted content, split a Discord audio call into different pieces and quit recording at any time.

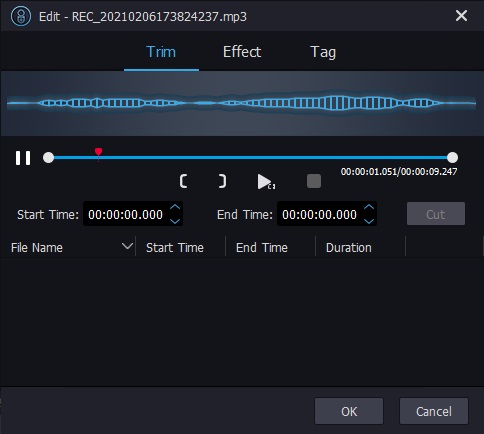
Step 4: Edit Discord Audio Recordings
Once you press the “Stop” button, a History window will appear with your recording files listed on it. You can easily rename your files and edit them by cutting and customizing ID3 tags.

Part 2. How to Record Discord Calls – Camtasia
Camtasia is one of the most sought-after video recording and editing tools, offering high-quality Discord audio recording and editing. With a clean and clear user interface, you will be able to get the hang of this tool quickly no matter whether you meet expertise requirements. When it comes to screen recording, this all-powerful video recorder will enable you to grab capturing screen freely. As for audio recording, you can choose to record system audio and/or microphone and drag to adjust the volume slider. More amazingly, after recording, you will be able to edit your recorded Discord chats directly using its built-in video and audio editor.

Step 1: After downloading Camtasia on your computer, run it and choose “New Recording”;
Step 2: On the minimized toolbar, go to the “Recorded inputs” section and press the down arrow to select from several audio setting options such as “Stereo mix”, “Do not record Microphone”, “Record system audio” etc.
Step 3: Drag the volume slider nearby to adjust the volume;
Step 4: Press the “rec” button to start to record Discord audio.

 “Input Source” icon in the bottom toolbar, and then select “system audio” as the input source. The software will now record the sound coming from your soundcard.
 Want to