Q: “How to record Wii gameplay?” – From Reddit
We always like to record game videos on various heated game consoles, such as Xbox One/360, PS3/4, Wii, etc. and then post them online to show off our outstanding gaming skills. Featuring a remarkable wireless controller, the Nintendo Wii console invites players of all ages into an incredible game world. If you are obsessive with playing games on Wii, it is necessary for you to learn how to record Wii gameplay so that you could share your gaming experience with your friends and fans. This article will offer you a detailed guide on how to do that with or without a capture card with ease.
- Part 1. Record Wii Game Footage Using Capture Card
- Part 2. Record Wii Game Footage via Joyoshare Screen Recorder (Windows & Mac)
- Part 3. Recommendation of Three Wii Game Recorders for Linux
Part 1. How to Record Nintendo Wii Gameplay with Game Capture Card
There are many capture cards in the market such as Elgato Game Capture HD, Blackmagic Design, AGPTEK Capture Card, etc. They are widely accepted in the market. If you happen to have one of them, you can use it to help you record Wii gameplay directly. Notice that usually, your needed HDMI cables will be included in your capture card box. This session will focus on how to use Elgato Capture Card to record Wii game footage.
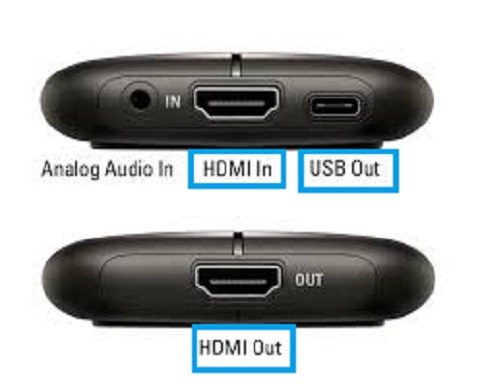
Step 1: Use one HDMI cable to connect your Elgato capture card’s “In” port and your Wii console;
Step 2: Use another HDMI cable to link your Elgato capture card’s “Out” port with your computer;
Step 3: Use a USB cable to connect your computer to your Wii;
Step 4: Download the software for your Elgato Capture Card on gamingdownloads.com;
Step 5: Run the software on your computer;
Step 6: Click the red button and start to record.
Part 2. How to Record Wii Gameplay without Capture Card
When it comes to game video recording, we always talk about Joyoshare Screen Recorder without any hesitation. As always, it enables you to record any video with/without audio in a perfect way. You are allowed to record gameplay on video game console, PowerPoint presentations, Netflix movies, zoom meetings, etc. with no time limit.
Additionally, you are able to save your recorded Wii gameplay as WMV, AVI, DV, MPEG, MP4, M4V, FLV, HD MKV, HEVC, MOV, etc. for YouTube, Facebook, Vimeo, etc. This program also provides a wide range of flexible editing features. You can manually set the start/end point of your recording task, insert watermark, show/hide cursor, adjust bit rate and frame rate, etc.

Key Features of Joyoshare Screen Recorder:
Grab recording area freely
Record videos without time limitation
Export recorded works into any format
Record videos and audios in high quality
Record gameplay on PS4, Xbox One, Xbox 360, etc.
Step 1: Connect Nintendo Wii to Computer
The first thing you need to do is to prepare a USB adapter that fits well with Will. The Nintendo Wii uses standard RCA video/audio cables. Though most of them will be standard for other electronic devices, you still need a Wii USB adapter to convert the Wii’s signal.
(1) Unplug the AV cable at the back of your Wii;
(2) Connect the Wii port on the end of the adapter to the back of your Wii;
(3) Use a USB cable to link your computer and the other end of the adapter;
(4) Double-click the adapter connection drive on your computer;
(5) Click the Start button and choose My Computer.
Step 2: Download Joyoshare Screen Recorder
Install and run Joyoshare Screen Recorder on your computer. Prepare to play your desirable gameplay on your Wii game console.
Step 3: Adjust Recording Settings
Find the gear icon  at the bottom right of the screen. Click it and you will see a series of editing options. You can click Format button under basic record options to select your wanted output format. You are able to schedule your Wii gameplay recording so that you don’t have to sit in front of your computer for hours. You are also allowed to change the pattern of your cursor and clicks.

Step 4: Set Recording Area
Next, press the Select Area icon “+” at the left of the screen. Feel free to drag the red frame to grab your recording area. You can also go to the nearby small triangle icon and choose customized area from the dropdown list. Then refer to the center of the screen. Here you can turn on/off system audio and microphone.
Note: Before recording, make sure that you have chosen “Record video and audio” mode. If not, click the camera button at the left side of the red REC button.

Step 5: Start to Record Wii Game Footage
Now press the red REC button at the right side of the operation window. After a 3-second countdown, this program will help record your Wii gameplay. A tool bar will appear outside the red frame. You can stop recording and cut unnecessary game video clips at any time.

Part 3. Introduction on 3 Linux Screen Recorders to Record Wii Gameplay
If you are running Linux system instead, you can go on to read. The following session of this article will introduce you many screen recorders that work great on your operating system.
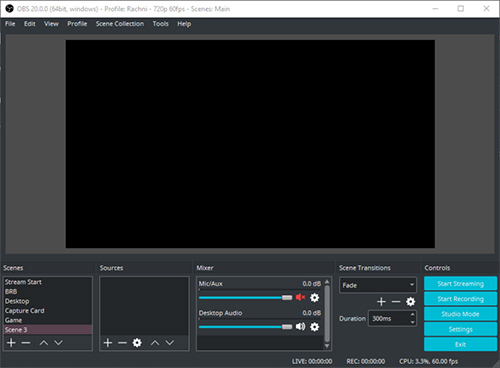
Open Broadcaster Software Studio
You may be familiar with its acronym, OBS. It is a free video streaming and recording tool. Featured with high performance, you can use it to create zero lag videos from images, text, webcams, browser windows, etc. This program also contains audio mixer along with per-source filters. As powerful it is, it will take you some time to figure out how to use it correctly.
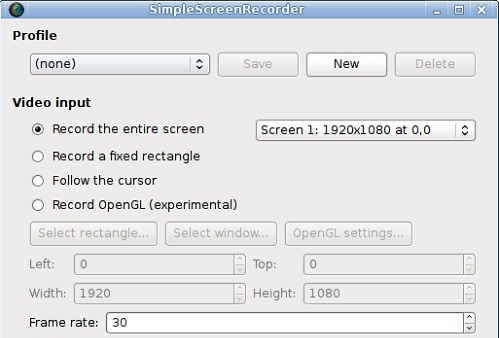
SimpleScreenRecorder
As literally, this Linux software can help you record games easily and quickly. Actually, it is claimed to be faster than VLC and FFmpeg. Furthermore, it can help you record game videos in real-time with audio. But it is worth mentioning that its live streaming function is still not stable enough.
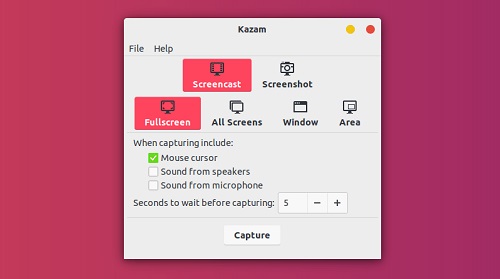
Kazam
It is not surprising that you will be probably impressed by its pink interface at the first sight. Kazam is a user-friendly screen recording tool for beginners. It supports screenshot as well. You can use it to record either entire screen or partial screen. Similar to other recording software, it allows you to save captured videos as AVI, MP4, etc. However, it doesn’t support webcam recording.
For more information, please visit the source page: https://www.joyoshare.com/record-screen/how-to-record-wii-gameplay.html
