You enter the wrong password on your iPhone screen again and again until you have accumulated 10 times in a row. Then the iPhone becomes disabled and even cannot connect to iTunes. What can you do to make this disabled iPhone unlocked and get it back to normal? In general, you can take the following four solutions to learn how to fix iPhone is disabled connect to iTunes at every step. Start now to have a go.
- Part 1: Fix Disabled iPhone with iTunes
- Part 2: Fix Disabled iPhone in Recovery Mode
- Part 3: Fix Disabled iPhone with iCloud “Find My iPhone”
- Part 4: Fix Disabled iPhone with iOS System Recovery
The Reason Why My iPhone Is Disabled Connect to iTunes
5 incorrect passcode attempts: iPhone is disabled, try again in 1 minute;
7 incorrect passcode attempts: iPhone is disabled, try again in 5 minutes;
8 incorrect passcode attempts: iPhone is disabled, try again in 15 minutes;
9 incorrect passcode attempts: iPhone is disabled, try again in 60 minutes;
10 incorrect passcode attempts: iPhone is disabled, connect to iTunes. Or iPhone is completely erased if you have enabled “Erase Data” on iPhone “Settings” > “Touch ID & Passcode” or “Passcode”.
Part 1. How to Fix iPhone Is Disabled Connect to iTunes by Using iTunes
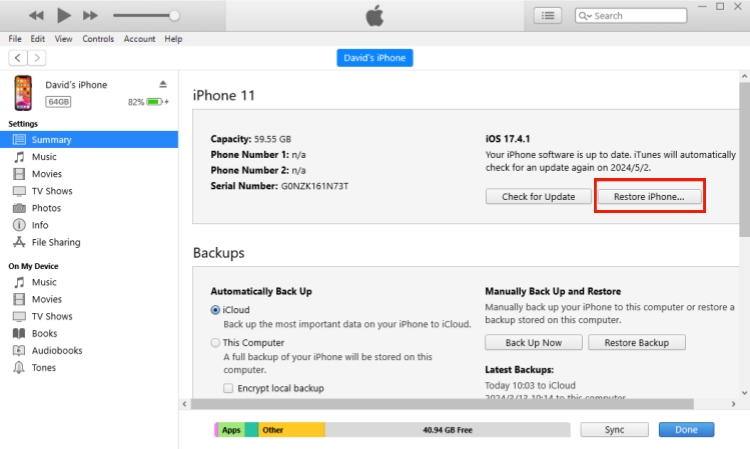
Step 1: Connect your iPhone to the trusted computer with a USB cable;
Step 2: Run iTunes and tap on the device icon in the left side;
Part 2. How to Fix iPhone Is Disabled Connect to iTunes via Recovery Mode
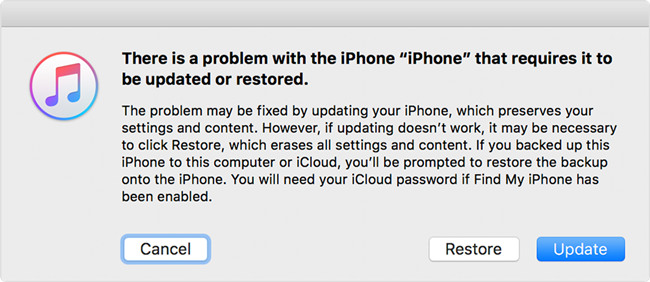
Step 1: Plug iPhone to computer and launch iTunes;
Part 3. How to Fix iPhone Is Disabled Connect to iTunes by Using iCloud
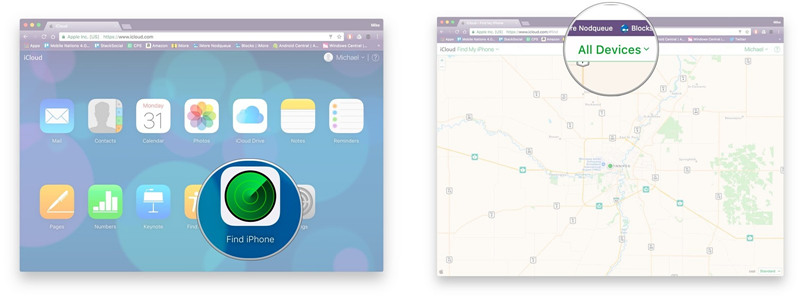
Step 1: Open a browser on your computer and visit icloud.com;
Step 2: Sign in iCloud with Apple ID and password;
Step 3: Go to “Find My iPhone” > “All Devices” to find your disabled iPhone from a list;
Step 4: Press on the name of your disabled iPhone and select “Erase iPhone” to wipe all data and settings, including screen passcode.
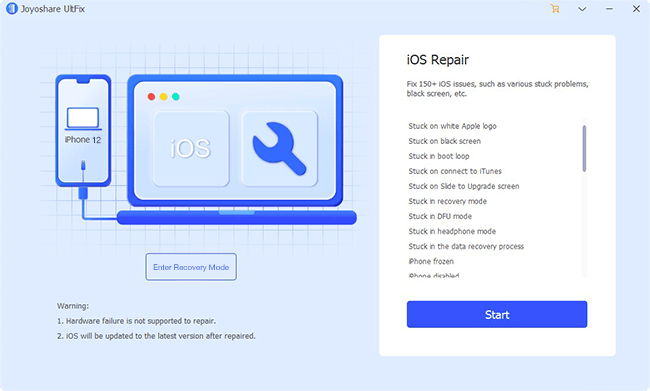
Part 4. How to Fix iPhone Is Disabled Connect to iTunes by Using Joyoshare UltFix
If the aforementioned three solutions are not available or a bit difficult for you to operate, you can now make the most use of this easy-to-use software, Joyoshare UltFix. It is a tool that has ability to effectively factory reset iPhone and unlocks its screen without passcode. Its full compatibility makes it work for all iPhone models and iOS versions with ease, such as iPhone XS/XR and iOS 13.
All that matters is that this iOS system recovery can help repair 30+ iOS issues without data loss. With the exception of iPhone is disabled, it can fix black screen, white Apple logo, iPhone stuck in boot loop, iPhone won’t restore, iPad stuck in data recovery process, etc. You can also use it to freely and instantly enter or exit Recovery Mode with just one click.
Step 1: Connect disabled iPhone and run program
Simply open Joyoshare UltFix iOS System Recovery and connect the disabled iPhone to the computer with a USB cable. Click on the “Start” button to proceed next step.
Step 2: Select a repair mode
Select the “Advanced Mode” to fix your disabled iPhone. Then you have to follow the step-by-step instructions to put your device to Recovery Mode or DFU Mode. After that, click the blue “Next” button.
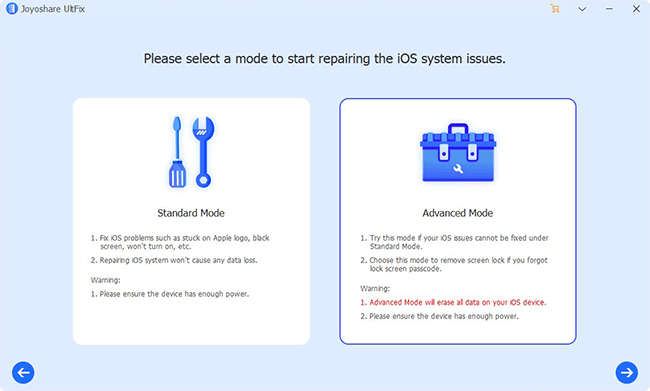
Note: On the main interface of this program, there is an “Enter Recovery Mode” option. It can help you quickly and freely enter Recovery Mode with one easy click.
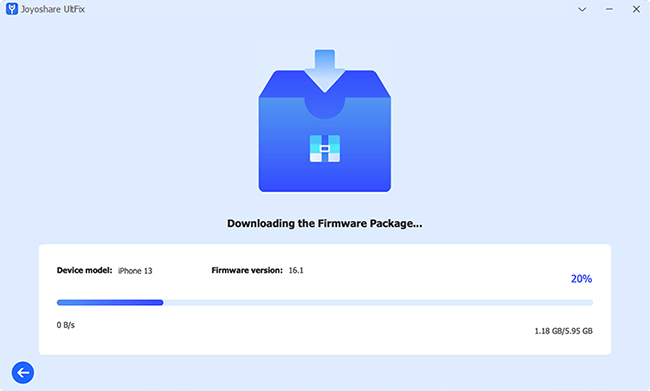
Step 3: Download & verify the firmware package
Once Joyoshare UltFix shows detected disabled iPhone info on the program, you can have a close look to check it. Next you have to click the “Download” button to download and verify the firmware package for iPhone.
Step 4: Fix iPhone is disabled connect to iTunes error

Press the “Repair” option to let this program remove iPhone lock without passcode. It will take a few minutes to get the disabled iPhone repaired.
For more info, you can visit the source page here:
https://www.joyoshare.com/iphone-repair/iphone-is-disabled-connect-to-itunes.html
